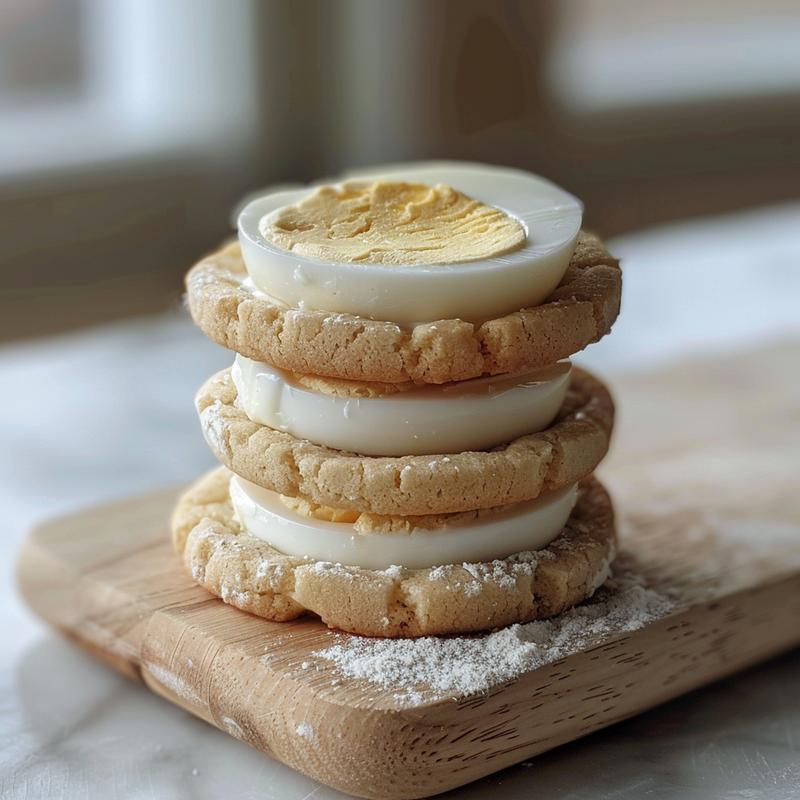
Ah, Easter. A time of rebirth, renewal, and, of course, delectable treats. As a culinary historian, I find myself drawn to the stories behind our cherished holiday traditions, and few are as delightful as the Easter egg. But today, we’re not just talking about dyed eggs; we’re talking about transforming that iconic shape into something even more special: Egg Cookies for Easter. I am thrilled to share this recipe, a delightful confection that’s as fun to make as it is to eat. It’s a journey into a sweet tradition, a chance to bake the most adorable and tasty cookies.
These aren’t just any sugar cookies; they are miniature canvases, waiting to be adorned with vibrant colors and playful designs. Think of them as edible Easter eggs, a whimsical twist on a classic treat. This recipe is more than just a set of instructions; it’s an invitation to create memories, to gather loved ones around the kitchen table, and to infuse your Easter celebration with a touch of homemade magic. It is a treat that will bring joy to all.
Why You’ll Love This Easter Egg Cookie Recipe
This recipe isn’t just about creating a pretty cookie; it’s about creating an experience. It’s about the joy of baking, the satisfaction of decorating, and the delight of sharing something you’ve made with love. There are so many reasons to love these Easter egg cookies:
- Taste: These cookies are perfectly balanced – sweet, buttery, and with a hint of vanilla.
- Tradition: Egg-shaped cookies are a classic Easter treat, bringing a sense of nostalgia and tradition to your celebrations.
- Creativity: Decorating these cookies is a wonderful opportunity to unleash your creativity and personalize each one.
- Fun for All Ages: From rolling out the dough to applying the final sprinkles, this recipe is a great activity for the whole family.
- Make Ahead: You can bake the cookies ahead of time and decorate them closer to Easter, making party preparation a breeze.
And honestly, it’s hard to resist a beautifully iced cookie, especially when it’s shaped like an egg and decorated with pastel colors. They are, quite simply, irresistible.
Ingredients: The Building Blocks of Sweetness
Let’s delve into the heart of our recipe: the ingredients. Each component plays a crucial role in creating the perfect Easter egg cookie, a symphony of flavors and textures that will dance on your palate.
- 1 cup (2 sticks) unsalted butter, softened: The foundation of our cookies, providing richness and tenderness.
- 1 1/2 cups granulated sugar: Sweetness and structure, working in harmony with the butter to create a light and airy texture.
- 2 large eggs: Binding the ingredients together, adding moisture, and contributing to the cookie’s overall richness. One egg adds a beautiful color and texture.
- 1 teaspoon vanilla extract: A touch of warmth and complexity, enhancing the other flavors. I like to use a high-quality vanilla extract for the best results.
- 3 cups all-purpose flour: The backbone of our dough, providing structure and stability.
- 1 teaspoon baking powder: A leavening agent, ensuring that our cookies are light and airy, not dense and heavy.
- 1/2 teaspoon salt: Enhancing the sweetness and balancing the flavors, preventing the cookies from being cloyingly sweet.
- Egg-shaped cookie cutter: The key to our Easter theme, allowing us to create perfectly shaped egg cookies.
- Royal icing (various colors): Our artistic medium, allowing us to transform simple cookies into miniature works of art.
- Sprinkles, optional: The final flourish, adding texture, color, and a touch of whimsy. I don’t think any cookie is complete without sprinkles!
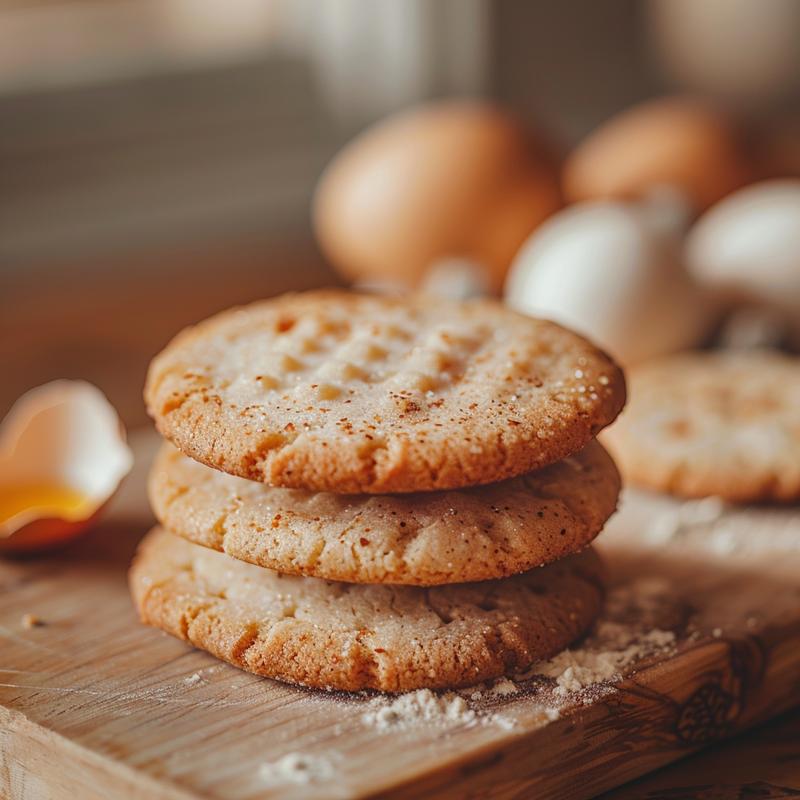
Step-by-Step: Crafting Your Easter Egg Cookies
Now, let’s embark on the journey of transforming these humble ingredients into delightful Easter egg cookies. Follow these steps carefully, and you’ll be rewarded with a batch of cookies that are as beautiful as they are delicious. It is not hard to bake the perfect cookie when you follow the directions.
- Preheat oven to 375°F (190°C): Setting the stage for baking perfection.
- In a large bowl, cream together the butter and sugar until light and fluffy: This is a crucial step, as it incorporates air into the dough, resulting in a tender cookie.
- Beat in the eggs one at a time, then stir in the vanilla extract: Ensuring that each ingredient is fully incorporated, creating a harmonious blend of flavors.
- In a separate bowl, whisk together the flour, baking powder, and salt: Combining the dry ingredients ensures that they are evenly distributed throughout the dough.
- Gradually add the dry ingredients to the wet ingredients, mixing until just combined. Do not overmix: Overmixing can result in tough cookies, so mix until just combined.
- Wrap the dough in plastic wrap and chill for at least 30 minutes: Chilling the dough allows the gluten to relax, preventing the cookies from spreading too much in the oven.
- On a lightly floured surface, roll out the dough to about 1/4 inch thickness: Rolling the dough too thin can result in brittle cookies, while rolling it too thick can result in underbaked cookies.
- Use the egg-shaped cookie cutter to cut out cookies: Cutting out the cookies with a sharp cookie cutter ensures clean edges and prevents them from sticking.
- Place cookies on ungreased baking sheets: Placing the cookies on ungreased baking sheets prevents them from sticking and ensures even baking.
- Bake for 8-10 minutes, or until the edges are lightly golden: Baking the cookies until the edges are lightly golden ensures that they are cooked through but not overbaked.
- Let cookies cool on baking sheets for a few minutes before transferring to a wire rack to cool completely: Allowing the cookies to cool on the baking sheets prevents them from breaking when transferred to the wire rack.
- Once cooled, decorate with royal icing and sprinkles: This is where your creativity shines! Use royal icing to create intricate designs, and don’t forget the sprinkles for a touch of whimsy.
Remember, baking is an art, so don’t be afraid to experiment and have fun! Putonapron and bake the most beautiful cookies.
Pro Tips for Perfect Easter Egg Cookies
To ensure that your Easter egg cookies are a resounding success, I’ve compiled a few pro tips that I’ve learned over years of baking these festive treats. These tips will help you avoid common pitfalls and elevate your cookies to the next level. These cookies are the best when you follow these tips.
- Use room temperature butter and eggs: This ensures that the ingredients blend together smoothly and evenly, resulting in a more tender cookie.
- Don’t overmix the dough: Overmixing can develop the gluten in the flour, resulting in tough cookies. Mix until just combined.
- Chill the dough for at least 30 minutes: Chilling the dough allows the gluten to relax, preventing the cookies from spreading too much in the oven.
- Roll out the dough evenly: Rolling out the dough to an even thickness ensures that the cookies bake evenly.
- Use a sharp cookie cutter: A sharp cookie cutter will create clean edges and prevent the cookies from sticking.
- Bake the cookies until the edges are lightly golden: Baking the cookies until the edges are lightly golden ensures that they are cooked through but not overbaked.
- Let the cookies cool completely before decorating: Decorating warm cookies can cause the icing to melt and run.
Common Mistakes to Avoid
Even the most experienced bakers can make mistakes, but knowing what to avoid can help you achieve cookie perfection. Here are a few common mistakes to watch out for:
- Overmixing the dough: As mentioned earlier, overmixing can result in tough cookies.
- Not chilling the dough: Skipping the chilling step can result in cookies that spread too much in the oven.
- Rolling the dough too thin or too thick: Rolling the dough too thin can result in brittle cookies, while rolling it too thick can result in underbaked cookies.
- Overbaking the cookies: Overbaking can result in dry, crumbly cookies.
- Decorating warm cookies: Decorating warm cookies can cause the icing to melt and run.
If you make a mistake, don’t despair! Baking is a learning process, and every batch of cookies is an opportunity to improve.
Variations: Adding Your Personal Touch
While this recipe is perfect as is, there’s always room for a little creativity. Here are a few variations to inspire you:
- Lemon zest: Add a teaspoon of lemon zest to the dough for a bright, citrusy flavor.
- Almond extract: Substitute almond extract for vanilla extract for a nutty, aromatic twist.
- Chocolate chips: Fold in chocolate chip cookies for a decadent treat.
- Colored dough: Divide the dough into portions and tint each portion with food coloring for a vibrant, multi-colored effect.
- Different shapes: Use different cookie cutters to create a variety of Easter-themed shapes, such as bunnies, chicks, and flowers.
Feel free to experiment and create your own unique variations! After all, baking is all about expressing your creativity and having fun.
Storage: Keeping Your Cookies Fresh
To keep your Easter egg cookies fresh and delicious, store them in an airtight container at room temperature. Properly stored, they will last for up to a week. You can also freeze the baked, undecorated cookies for up to two months. Thaw them completely before decorating.
These cookies will last for a week if stored properly. Don’t leave them out in the open, or they will become stale.
Frequently Asked Questions (FAQ)
Here are some frequently asked questions about making Easter egg cookies:
- Can I use salted butter instead of unsalted butter? Yes, but reduce the amount of salt in the recipe by 1/4 teaspoon.
- Can I use a different type of flour? All-purpose flour is recommended for this recipe, but you can substitute it with gluten-free all-purpose flour for a gluten-free version.
- Can I make the dough ahead of time? Yes, you can make the dough up to two days in advance and store it in the refrigerator.
- Can I freeze the cookies? Yes, you can freeze the baked, undecorated cookies for up to two months.
- How do I make royal icing? Royal icing is made from powdered sugar, egg whites (or meringue powder), and water. There are many recipes available online.
If you have any other questions, feel free to ask in the comments section below!
Serving Suggestions: Sharing the Joy
These Easter egg cookies are perfect for sharing with loved ones. Here are a few serving suggestions:
- Easter brunch: Serve them alongside other Easter treats, such as hot cross buns and deviled eggs.
- Easter egg hunt: Hide them around the yard for a fun and delicious surprise.
- Gift giving: Package them in a decorative box or bag and give them as gifts to friends and family.
- Dessert table: Display them on a dessert table at your Easter celebration.
- Afternoon tea: Enjoy them with a cup of tea or coffee for a delightful afternoon treat.
No matter how you choose to serve them, these Easter egg cookies are sure to bring joy and smiles to everyone who tastes them. They are cute desserts that everyone will enjoy. So glad I could share this recipe with you.
As I reflect on this recipe, I’m reminded that cooking is more than just combining ingredients; it’s about creating memories, preserving traditions, and sharing love. These Easter egg cookies are a testament to that, a delicious reminder of the joy and togetherness that this special holiday brings. I m so happy to share this with you. Happy Easter, and happy baking!

Egg Cookies for Easter
Ingredients
Method
- Preheat oven to 375°F (190°C).
- Cream butter and sugar until light and fluffy.
- Beat in eggs, then vanilla extract.
- Whisk together flour, baking powder, and salt.
- Gradually add dry ingredients to wet ingredients, mix until combined.
- Chill dough for at least 30 minutes.
- Roll out dough to 1/4 inch thickness.
- Cut out cookies using egg-shaped cutter.
- Place cookies on ungreased baking sheets.
- Bake for 8-10 minutes until lightly golden.
- Cool cookies on baking sheets, then transfer to a wire rack.
- Decorate with royal icing and sprinkles.
Notes
Loved this recipe? Save it to your favorite Pinterest board so you can easily find it later! ✨