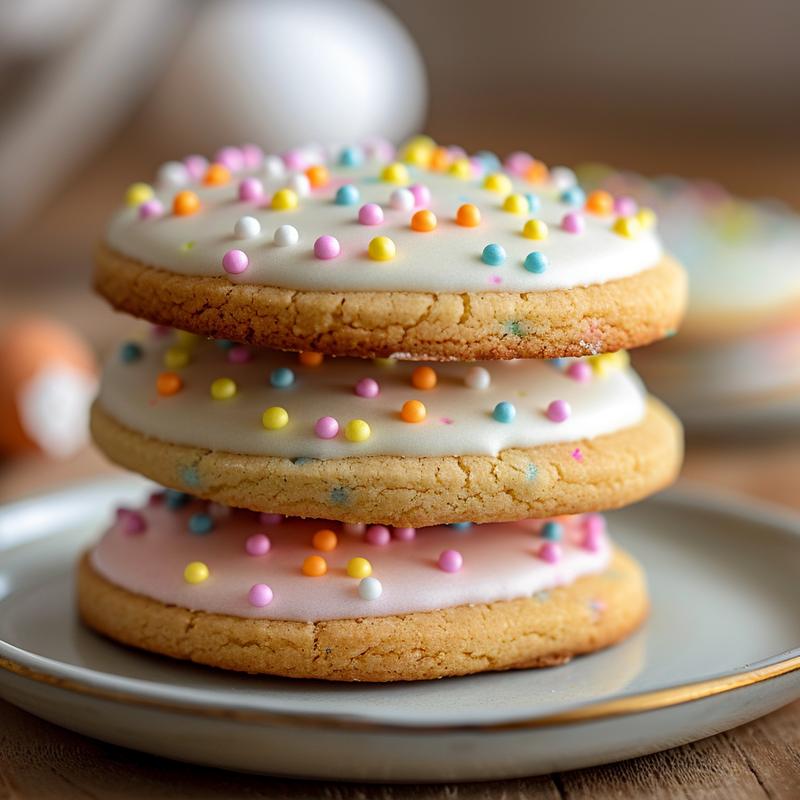
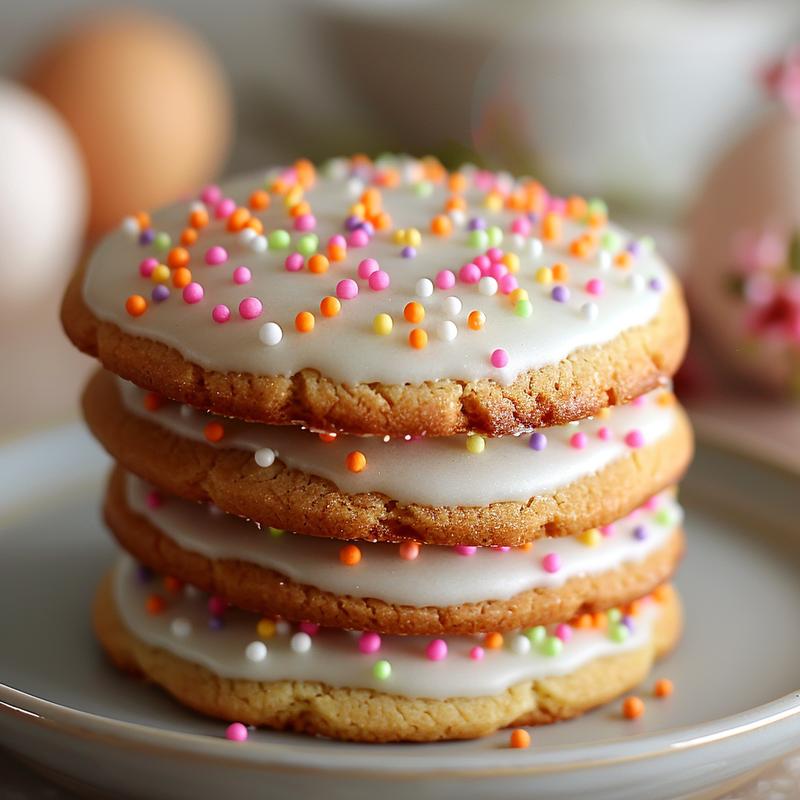
Decorated Hello Spring Cookies with Royal Icing: A Masterclass in Spring Baking
Hello, fellow culinary artists! I’m Jessie, and welcome to a deep dive into the delightful world of decorated Hello Spring cookies. As a former sommelier and mixologist, I approach baking with the same precision and passion I’d bring to crafting the perfect cocktail. We’re not just making cookies; we’re creating edible art, a symphony of flavors and aesthetics perfect for celebrating the season.
In this guide, we’ll deconstruct the classic sugar cookie and elevate it with the finesse of royal icing. Get ready to master the techniques that will transform your spring baking from ordinary to extraordinary. We’ll focus on achieving that perfect balance of sweetness, texture, and visual appeal.
Why You’ll Love These Decorated Spring Cookies
These aren’t your average sugar cookies. Think of them as tiny canvases waiting for your artistic touch. Here’s why you’ll fall in love with this recipe:
- Visually Stunning: The royal icing allows for intricate designs, turning each cookie into a miniature masterpiece.
- Customizable Flavors: We’ll explore variations to add depth and complexity to the cookie dough itself.
- Perfect for Gifting: Imagine the joy of presenting a beautifully decorated box of these cookies to friends and family.
- A Therapeutic Activity: The process of decorating is calming and rewarding, a delightful way to unwind and express your creativity.
- Deliciously Balanced: The crisp cookie provides the perfect counterpoint to the sweetness of the icing. This balance is key!
I love sharing my passion for the culinary arts, and I look forward to guiding you through this exciting project. Thank you for joining me on this sweet adventure! I’m excited to see your creations.
Ingredients: The Building Blocks of Perfection
Just like a fine wine, the quality of your ingredients will significantly impact the final result. Let’s break down each component:
For the Cookies:
- All-Purpose Flour (3 cups): Provides structure and texture. We’re aiming for a tender crumb, not a tough one.
- Unsalted Butter, Softened (1 cup or 2 sticks): Adds richness and flavor. Ensure it’s properly softened for a smooth dough.
- Granulated Sugar (1 cup): Sweetness and moisture. The right amount is crucial for balance.
- Large Egg (1): Binds the ingredients and adds richness.
- Vanilla Extract (1 teaspoon): Enhances the overall flavor profile. Use pure vanilla for the best aromatics.
- Baking Powder (1/2 teaspoon): Leavening agent for a slightly puffed cookie.
- Salt (1/4 teaspoon): Balances the sweetness and enhances the other flavors.
For the Royal Icing:
- Powdered Sugar (4 cups or 1 lb): The foundation of our smooth, glossy icing.
- Meringue Powder (3 tablespoons): Provides stability and structure to the icing, ensuring it dries hard and doesn’t crack.
- Warm Water (5-7 tablespoons): Used to achieve the desired consistency. Add gradually, as too much water will result in a runny icing.
- Gel Food Coloring (various spring colors): For creating vibrant and beautiful designs. Gel colors are preferred over liquid, as they won’t dilute the icing as much.
Thank you so much for taking the time to review these ingredients. I’m so glad you’re here!
Step-by-Step Guide: From Dough to Decorative Masterpiece
Let’s get started! Follow these steps carefully to ensure success.
Make the Cookies:
- Cream the Butter and Sugar: In a large bowl, cream together the softened butter and sugar until light and fluffy. This step is crucial for incorporating air and creating a tender cookie.
- Beat in the Egg and Vanilla: Add the egg and vanilla extract and beat until well combined.
- Combine Dry Ingredients: In a separate bowl, whisk together the flour, baking powder, and salt.
- Gradually Add Dry to Wet: Gradually add the dry ingredients to the wet ingredients, mixing until just combined. Be careful not to overmix, as this will develop the gluten and result in a tough cookie.
- Chill the Dough: Divide the dough in half, flatten into disks, wrap in plastic wrap, and chill for at least 1 hour (or preferably longer). Chilling prevents the cookies from spreading too much during baking.
- Preheat and Prepare: Preheat oven to 350°F (175°C). Line baking sheets with parchment paper.
- Roll Out the Dough: On a lightly floured surface, roll out the dough to about 1/4 inch thickness.
- Cut Out Shapes: Use spring-themed cookie cutters (flowers, butterflies, etc.) to cut out shapes.
- Bake: Place cookies on the prepared baking sheets and bake for 8-10 minutes, or until the edges are lightly golden.
- Cool Completely: Let cookies cool on the baking sheets for a few minutes before transferring them to a wire rack to cool completely.
Make the Royal Icing:
- Combine Dry Ingredients: In a large bowl, combine the powdered sugar and meringue powder.
- Add Water Gradually: Gradually add the warm water, one tablespoon at a time, mixing on low speed until a smooth icing forms. Adjust water as needed to reach desired consistency.
- Divide and Tint: Divide the icing into separate bowls and tint each bowl with different gel food coloring.
- Prepare Piping Bags: Transfer each color of icing into piping bags fitted with small round tips.
Decorate the Cookies:
- Outline: Outline each cookie with icing. Let the outline dry for about 15-20 minutes. This creates a dam to prevent the flood icing from running off the edges.
- Flood: Flood the inside of the outline with thinned icing (add a few drops of water to the icing to make it more fluid). The consistency should be similar to that of school glue.
- Smooth and Pop Bubbles: Use a toothpick or scribe tool to smooth the icing and pop any air bubbles.
- Dry Completely: Let the flooded icing dry completely (several hours or overnight). Patience is key!
- Add Details: Add details to the cookies with the remaining icing, such as dots, lines, or floral patterns.
- Final Dry: Let the decorated cookies dry completely before serving or storing.
Congratulations on making it this far! I am so happy to share this recipe with you!
Pro Tips for Perfect Spring Cookies
Elevate your cookie game with these expert tips:
- Butter Temperature: Ensure your butter is properly softened. It should be soft enough to leave a slight indentation when pressed, but not melted or greasy.
- Chilling Time: Don’t rush the chilling process. Well-chilled dough is essential for preventing spreading and maintaining the cookie’s shape.
- Icing Consistency: Mastering the consistency of royal icing is crucial. It should be smooth and flowable, but not too runny. Experiment with adding water a tiny bit at a time until you achieve the desired consistency.
- Piping Techniques: Practice your piping skills on parchment paper before decorating the cookies. This will help you get a feel for the pressure and control needed for intricate designs.
- Drying Time: Allow ample drying time between layers of icing. This will prevent colors from bleeding and ensure a professional finish.
Common Mistakes to Avoid
Even experienced bakers can make mistakes. Here’s what to watch out for:
- Overmixing the Dough: This develops the gluten, resulting in a tough cookie. Mix until just combined.
- Using Too Much Flour: This can make the cookies dry and crumbly. Measure your flour accurately.
- Overbaking: Overbaked cookies will be dry and hard. Keep a close eye on them in the oven and remove them when the edges are lightly golden.
- Inconsistent Icing Consistency: This can lead to uneven coverage and unsightly results. Take your time and adjust the water carefully.
- Rushing the Drying Process: This can cause colors to bleed and designs to smudge. Be patient and allow ample drying time.
Variations: Adding Your Personal Touch
Don’t be afraid to experiment and make this recipe your own:
- Citrus Zest: Add lemon, orange, or lime zest to the cookie dough for a bright, refreshing flavor.
- Almond Extract: Substitute almond extract for vanilla extract for a nutty, aromatic twist.
- Spices: Incorporate spices like cinnamon, nutmeg, or cardamom for a warm, comforting flavor.
- Chocolate Chips: Add mini chocolate chips to the dough for a touch of chocolatey goodness.
- Different Flavored Extracts: Experiment with other extracts like peppermint, raspberry, or coconut.
Storage: Keeping Your Cookies Fresh
Proper storage is essential for maintaining the quality of your decorated cookies:
- Airtight Container: Store the cookies in an airtight container at room temperature.
- Layering: If stacking the cookies, place a sheet of parchment paper between each layer to prevent sticking.
- Avoid Humidity: Store in a cool, dry place away from direct sunlight and humidity.
- Freezing: Decorated cookies can be frozen for up to 2-3 months. Wrap them individually in plastic wrap and then place them in an airtight container. Thaw completely before serving.
Frequently Asked Questions (FAQ)
Let’s address some common questions:
- Can I make the dough ahead of time? Yes, the dough can be made up to 2 days in advance and stored in the refrigerator.
- Can I freeze the undecorated cookies? Yes, baked and cooled cookies can be frozen for up to 2-3 months.
- What if my icing is too thick? Add a few drops of water at a time until you reach the desired consistency.
- What if my icing is too thin? Add a small amount of powdered sugar until you reach the desired consistency.
- Can I use a different type of sugar? Granulated sugar is recommended for this recipe, but you can experiment with other types of sugar, such as caster sugar.
I am looking forward to seeing your cookies!
Serving Suggestions: Presenting Your Edible Art
Presentation is key! Here are some ideas for serving your decorated spring cookies:
- Gift Boxes: Arrange the cookies in a decorative gift box for a thoughtful and beautiful present.
- Cookie Platters: Create a stunning cookie platter with a variety of spring-themed designs.
- Dessert Table: Incorporate the cookies into a dessert table for a special occasion.
- Tea Parties: Serve the cookies with tea or coffee for a delightful afternoon treat.
- Individual Packaging: Wrap each cookie individually in cellophane bags for a charming and portable treat.
Thank you for sharing your time with me, and I for sharing my passion with you! I look forward to hearing about your cookie decorating adventures. Your work is truly appreciated, and congratulations on embarking on this sweet journey!

Decorated Hello Spring Cookies with Royal Icing
Ingredients
Method
- Cream butter and sugar until fluffy. Beat in egg and vanilla.
- Whisk flour, baking powder, and salt. Gradually add to wet ingredients.
- Divide dough, chill for 1 hour.
- Preheat oven to 350°F (175°C). Line baking sheets.
- Roll out dough, cut shapes, bake for 8-10 minutes. Cool completely.
- Combine powdered sugar and meringue powder. Add water until smooth.
- Divide icing, tint with food coloring, transfer to piping bags.
- Outline cookies, let dry. Flood with thinned icing, smooth, let dry.
- Add details with icing. Let dry completely.
Notes
Loved this recipe? Save it to your favorite Pinterest board so you can easily find it later! ✨