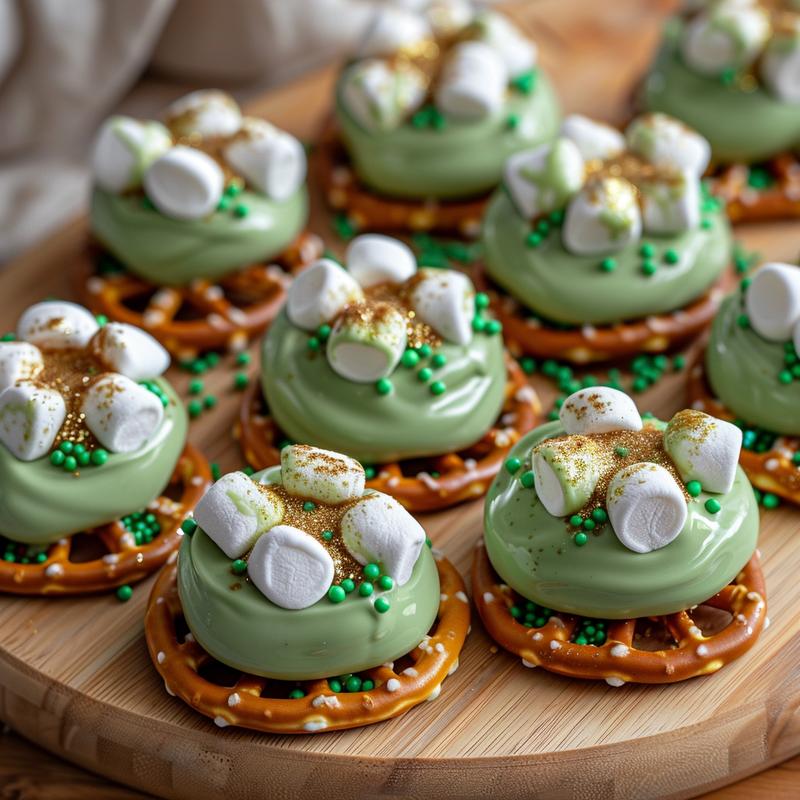
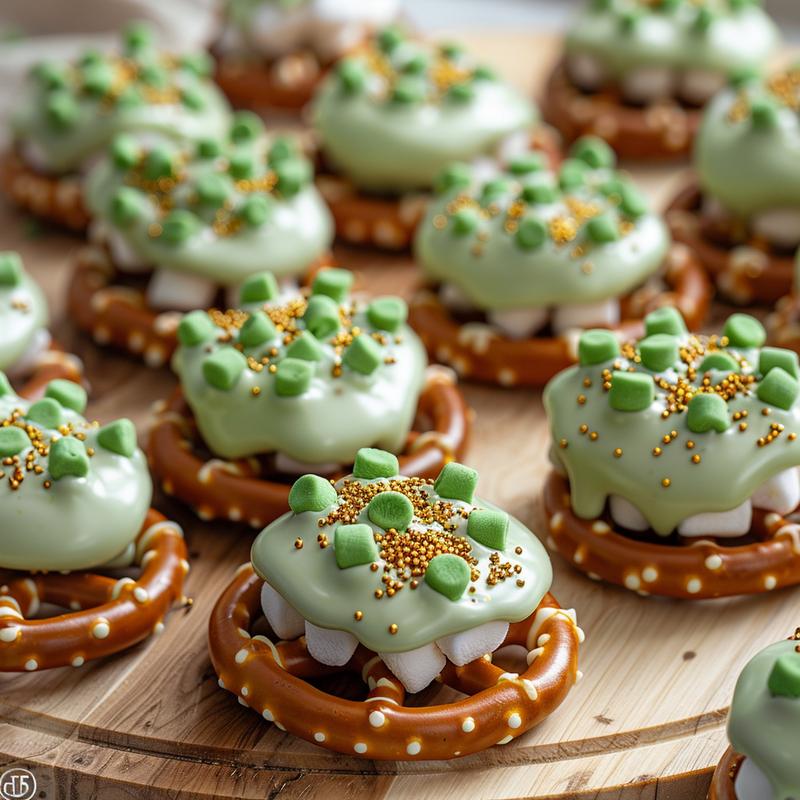
Looking for a fun and easy St Patrick’s Day snack for kids? This no-bake recipe is simple, cute, and perfect for little hands to help make! These adorable St. Patrick’s Day pretzel bites are the perfect way to celebrate St. Patrick’s Day with your little ones. They’re easy to make, require no baking, and are incredibly festive. If you’re looking for a quick and easy treat to bring to a St. Patrick’s Day party or simply want a fun activity to do with your kids, you’ve come to the right place. We’re diving into a simple recipe that will transform ordinary pretzels and marshmallows into a pot of gold at the end of the rainbow. It’s a delightful project that combines creativity, fun, and of course, deliciousness!
As a former sommelier and certified mixologist, I approach every recipe with a focus on balance and precision. While these pretzel bites are simple, we can still apply some culinary principles to ensure the best possible outcome. Think of the green candy melts as our primary flavor, the pretzel as our textural element, and the sprinkles as our aromatic enhancer. The marshmallow adds a touch of sweetness and creates a delightful contrast. Let’s get started on this festive treat!
Why You’ll Love This St. Patrick’s Day Snack
There are so many reasons why you’ll adore these no-bake St. Patrick’s Day snacks. For starters, they are incredibly easy to make. No oven required! This makes them perfect for even the youngest chefs in your family to participate. Here’s a breakdown:
- Simplicity: These snacks require minimal effort and ingredients.
- Kid-Friendly: The process is fun and engaging for children of all ages.
- Festive: The green candy melts, sprinkles, and edible gold glitter create a visually appealing and celebratory treat.
- No-Bake: No need to turn on the oven, making it a great option for warm weather or when you’re short on time.
- Customizable: You can easily adapt the ingredients to suit your preferences or dietary needs.
Beyond the ease of preparation, these snacks offer a delightful combination of flavors and textures. The salty pretzels provide a satisfying crunch, while the sweet candy melts and marshmallows create a creamy and gooey contrast. The sprinkles add a touch of whimsy and a burst of flavor. It’s a delightful treat that will appeal to both kids and adults alike. St. Patrick’s Day snacks don’t have to be complicated to be delicious. This recipe proves that simple ingredients and a little creativity can go a long way.
Ingredients for Your No-Bake St. Patrick’s Day Treat
The beauty of this recipe lies in its simplicity. You only need a few key ingredients to create these adorable St. Patrick’s Day snacks. Here’s what you’ll need:
- Green candy melts: These are the star of the show, providing the vibrant green color and sweet flavor. Make sure you use a good quality brand for the best results.
- Mini pretzels: The salty pretzels provide a satisfying crunch and a perfect base for the candy melts and marshmallows.
- Green sprinkles: These add a festive touch and a burst of flavor. Look for sprinkles that are specifically designed for candy melts, as they tend to adhere better.
- Marshmallows (mini or regular): The marshmallows add a touch of sweetness and create a delightful contrast in texture. Mini marshmallows are easier to work with, but regular marshmallows can be used as well.
- Edible gold glitter (optional): This adds a touch of sparkle and whimsy, making these snacks even more festive.
Consider the quality of your ingredients. Just like in cocktail making, where the quality of your spirits matters, the quality of your candy melts and sprinkles will impact the overall flavor and appearance of your snacks. Don’t be afraid to experiment with different types of sprinkles or even add a pinch of sea salt to the candy melts for a more complex flavor profile.
Step-by-Step Instructions: Making Your St. Patrick’s Day Snack
Now that you have all your ingredients, it’s time to get started! Follow these simple steps to create your adorable no-bake St. Patrick’s Day snacks:
- Melt the green candy melts according to package directions. Be careful not to overheat the candy melts, as this can cause them to seize up. Microwave in 30-second intervals, stirring in between, until smooth and melted.
- Dip each pretzel into the melted green candy and place on parchment paper. Use a fork or dipping tool to ensure the pretzel is fully coated. Parchment paper will prevent the pretzels from sticking.
- Immediately sprinkle with green sprinkles and edible gold glitter (if using). The candy melts will set quickly, so it’s important to add the sprinkles and glitter immediately after dipping.
- Let the pretzels set completely. This will take about 15-20 minutes. You can speed up the process by placing the pretzels in the refrigerator.
- If using regular marshmallows, cut them in half. Dip the cut side of each marshmallow into the melted green candy. This will create a sticky surface for attaching the marshmallow to the pretzel.
- Attach the candy-covered marshmallow to the pretzel. Gently press the marshmallow onto the pretzel, ensuring it adheres securely.
- Let everything set completely before serving. This will ensure that the candy melts are firm and the marshmallows are securely attached.
The key to success is working quickly and efficiently. Have all your ingredients prepped and ready to go before you start melting the candy melts. This will prevent the candy melts from hardening before you have a chance to dip the pretzels and marshmallows.
Pro Tips for Perfect St. Patrick’s Day Pretzel Bites
To ensure your St. Patrick’s Day pretzel bites are a resounding success, here are a few pro tips to keep in mind:
- Candy Melt Consistency: Achieving the right consistency for your candy melts is crucial. If the melts are too thick, they will be difficult to work with and may not coat the pretzels evenly. If they are too thin, they may not adhere properly. Add a teaspoon of vegetable oil or shortening to the melted candy to thin it out if needed.
- Parchment Paper is Your Friend: Always use parchment paper or a silicone baking mat to prevent the pretzels from sticking. This will make cleanup a breeze and ensure that your pretzel bites look their best.
- Sprinkle Strategically: Don’t be afraid to get creative with your sprinkles! Use a variety of colors and shapes to add visual interest. You can even use edible gold glitter for a touch of sparkle.
- Marshmallow Placement: When attaching the marshmallows, make sure they are securely attached to the pretzel. Gently press the marshmallow onto the pretzel, ensuring it adheres firmly.
- Cooling Time: Allow the pretzel bites to cool completely before serving. This will ensure that the candy melts are firm and the marshmallows are securely attached.
Remember, these are inexpensive desserts and easy treats, so don’t stress too much about perfection. The most important thing is to have fun and enjoy the process. These are family desserts to be enjoyed. If you’re looking for a way to elevate the presentation, consider using a decorative serving platter or arranging the pretzel bites in a festive pattern.
Common Mistakes to Avoid
Even with a simple recipe, there are a few common mistakes that can derail your efforts. Here’s what to watch out for:
- Overheating the Candy Melts: Overheating candy melts can cause them to seize up and become unusable. Microwave in short intervals, stirring frequently, to prevent this.
- Using Expired Ingredients: Expired ingredients can affect the flavor and texture of your pretzel bites. Make sure all your ingredients are fresh before you start.
- Not Working Quickly Enough: Candy melts set quickly, so it’s important to work efficiently. Have all your ingredients prepped and ready to go before you start melting the candy melts.
- Skipping the Parchment Paper: Skipping the parchment paper can result in the pretzels sticking to the surface, making them difficult to remove and potentially ruining their appearance.
- Rushing the Cooling Process: Rushing the cooling process can result in the candy melts not setting properly, leaving you with a sticky mess.
By avoiding these common mistakes, you’ll be well on your way to creating perfect St. Patrick’s Day pretzel bites every time. If you’re looking for a way to troubleshoot candy melts that have seized, try adding a small amount of vegetable oil or shortening and stirring until smooth.
Variations to Make It Your Own
One of the best things about this recipe is how easily it can be customized to suit your preferences. Here are a few variations to try:
- Different Candy Melts: Experiment with different colors and flavors of candy melts. Try using white chocolate candy melts and adding green food coloring, or use a combination of green and white candy melts for a marbled effect.
- Different Sprinkles: Use a variety of sprinkles to add visual interest. Try using rainbow sprinkles, gold sprinkles, or even chocolate sprinkles.
- Different Marshmallows: Use different sizes and flavors of marshmallows. Try using flavored marshmallows, such as strawberry or vanilla, or use mini marshmallows for a bite-sized treat.
- Add Nuts or Chocolate Chips: Add chopped nuts or chocolate chips to the candy melts for added flavor and texture.
- Drizzle with Chocolate: Drizzle the pretzel bites with melted chocolate for an extra touch of decadence.
Don’t be afraid to get creative and experiment with different combinations of ingredients. The possibilities are endless! Consider adding a touch of sea salt to the candy melts for a sweet and salty flavor profile, or use different shapes of pretzels for added visual appeal. If you’re looking for a way to incorporate the chocolate, try drizzling with dark chocolate after the green candy has set.
How to Store Your St. Patrick’s Day Snacks
To keep your St. Patrick’s Day pretzel bites fresh and delicious, store them in an airtight container at room temperature. They will keep for up to a week. Avoid storing them in the refrigerator, as this can cause the candy melts to become sticky.
If you’re making these snacks in advance, you can store the individual components separately. Store the pretzels in an airtight container at room temperature, and store the candy melts and marshmallows in separate containers in a cool, dry place. When you’re ready to assemble the pretzel bites, simply melt the candy melts and follow the instructions above.
Proper storage is key to maintaining the quality and flavor of your St. Patrick’s Day snacks. If you’re looking for a way to keep them extra fresh, consider adding a desiccant packet to the airtight container.
Frequently Asked Questions (FAQ)
Here are some frequently asked questions about making St. Patrick’s Day pretzel bites:
- Can I use regular chocolate instead of candy melts? While you can use regular chocolate, candy melts are specifically designed to melt smoothly and set firmly, making them a better choice for this recipe.
- Can I make these snacks ahead of time? Yes, you can make these snacks ahead of time. Store them in an airtight container at room temperature for up to a week.
- Can I freeze these snacks? While you can freeze these snacks, it’s not recommended, as the candy melts may become discolored and the pretzels may become soggy.
- Can I use different types of pretzels? Yes, you can use different types of pretzels, such as pretzel rods or pretzel snaps.
- Can I use different types of marshmallows? Yes, you can use different types of marshmallows, such as flavored marshmallows or mini marshmallows.
If you have any other questions, feel free to leave a comment below. We’re always happy to help! Remember, if you’re looking for ways to adapt the recipe for dietary restrictions, consider using gluten-free pretzels or vegan marshmallows.
Serving Suggestions for Your Festive Treat
These St. Patrick’s Day pretzel bites are perfect for serving at parties, potlucks, or as a fun after-school snack. Here are a few serving suggestions:
- Arrange them on a decorative platter: This will add a touch of elegance to your presentation.
- Serve them in individual treat bags: This is a great option for parties or potlucks.
- Pair them with a glass of milk or hot chocolate: This will create a delicious and satisfying treat.
- Add them to a St. Patrick’s Day dessert board: This is a fun and festive way to showcase your creativity.
These pretzel bites are not just a snack; they’re a celebration of St. Patrick’s Day in every bite! If you’re looking for a way to elevate the serving experience, consider using a tiered dessert stand or adding a festive tablecloth.
With these tips and tricks, you’re well-equipped to create adorable and delicious no-bake St. Patrick’s Day snacks that kids (and adults!) will love. So gather your ingredients, put on some festive music, and get ready to celebrate St. Patrick’s Day in style! Remember, the key is to have fun and enjoy the process. Happy baking!

Cute No-Bake St Patrick's Day Snack Kids Will Love
Ingredients
Method
- Melt the green candy melts according to package directions.
- Dip each pretzel into the melted green candy and place on parchment paper.
- Immediately sprinkle with green sprinkles and edible gold glitter (if using).
- Let the pretzels set completely.
- If using regular marshmallows, cut them in half. Dip the cut side of each marshmallow into the melted green candy.
- Attach the candy-covered marshmallow to the pretzel.
- Let everything set completely before serving.
Notes
Loved this recipe? Save it to your favorite Pinterest board so you can easily find it later! ✨